 By Ethan Brooks
Updated November 2026
Printable Thanksgiving decorations let you dress up a table, doorway, or mantel in an afternoon without a trip to the store. By the end of this guide, you will know how to pick printable designs that suit your space, set your printer and paper for clean results, size and assemble the pieces, and avoid the common mistakes that make homemade decor look flat. Thanksgiving decorations to print can range from simple place cards to full garland strings, and most of them need only a home printer, some cardstock, and basic craft supplies.
Why Printable Thanksgiving Decorations Work Well
Printables are flexible. You can print one design in several sizes, reprint it if you tear one, and change colors or text for each year. They also suit small apartments and rentals, where hanging large store-bought pieces may not be practical. If you are still deciding where to shop for the rest of your fall decor, Where Can I Find Thanksgiving Decorations: A Practical Guide (2026) covers the main options and how to compare them.
Shopping for one? See our guide: 6 Best Thanksgiving Dining Table Decorations for Fall Dinners (2026).
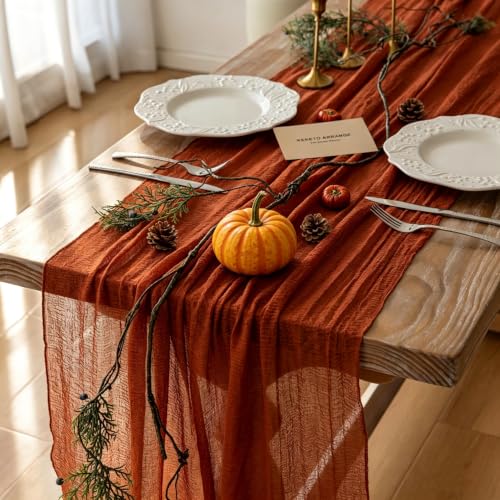
The main tradeoff is paper quality. A flimsy sheet printed in faint ink can look washed out next to a wooden table or cloth napkins. Most of the work in a good printable project happens before you press print: choosing the right file, adjusting the size, and selecting paper with enough weight to hold its shape.
Step 1: Choose Designs That Match Your Space
Start by deciding where the decor will go. A table setting needs small, delicate pieces such as place cards, menu cards, and napkin rings. A front door or wall needs larger, bolder designs that read from a distance. Yard and window displays need printables sealed against moisture and wind.
Common printable categories include:
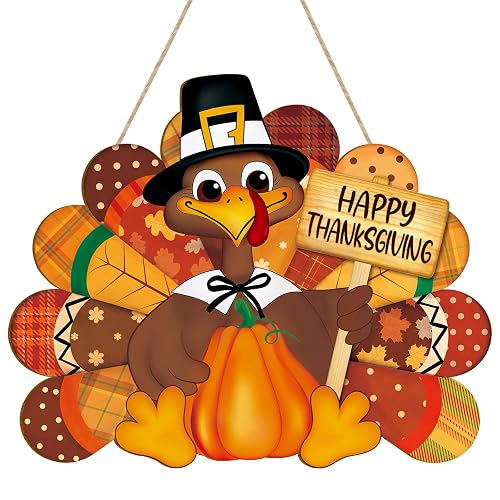
- Banners and garlands: strings of turkeys, leaves, or the words “Give Thanks” that hang across a mantel or doorway.
- Table cards: place cards, name tags, and menu cards for the dinner table.
- Wall art: framed or taped-up prints with gratitude quotes, harvest scenes, or botanical illustrations.
- Gift tags and favors: small tags that guests can take home or that label dishes.
- Pattern sheets: repeating leaf or acorn prints you can cut and layer.
If you are styling a full table, it helps to pick a color palette first, usually two or three colors plus a neutral. Use the same palette across all printables so the pieces look like they belong together. For ideas on coordinating table pieces, 7 Best Thanksgiving Decorations for Table Settings in 2026 offers a useful reference for layout and balance.
Step 2: Prepare Your Printer and Paper
Before printing a full set, run one test page. Check color accuracy, margins, and whether any part of the design gets cut off at the edges. Many home printers leave a border of about a quarter inch that cannot be printed, so leave that margin when you design or resize.
Paper Weight
For most decor, use cardstock in the range of 65 to 110 pound (roughly 176 to 300 gsm). Standard copy paper, around 20 pound, bends easily and shows every crease. Heavier stock holds its shape on a wall or in a stand. Manufacturers of many cardstock brands list their weight on the package, so check that before buying.
Print Settings
- Set the print quality to “high” or “best” for images and text.
- Select the correct paper type in your printer settings so the ink lays down properly.
- Turn off “fit to page” if you need exact sizing, and print at 100 percent scale.
- Let inkjet prints dry for at least 10 minutes before handling to avoid smudges.
Step 3: Size and Layout Each Piece
Sizing is where many projects go wrong. A place card that looks right on screen can turn out too big or too small once printed. Use this rough guide when you set up your files:
| Decor Type | Typical Size | Best Paper | Where It Works Best |
|---|---|---|---|
| Place cards | 2 x 3.5 inches | Cardstock, 80 lb | Dinner table |
| Gift tags | 2 x 3 inches | Cardstock, 65 lb | Favors, dishes |
| Garland pieces | 4 to 6 inches each | Cardstock, 80 to 110 lb | Mantel, doorway |
| Wall art | 8 x 10 or 11 x 14 inches | Matte cardstock or photo paper | Entryway, gallery wall |
| Window silhouettes | 8 to 12 inches tall | Heavy cardstock or vinyl sheets | Front windows |
Sizes are starting points. Always measure the actual space before you print. For a mantel, lay a strip of painter’s tape along the width and test the garland length first.
Assembling Garlands
- Print the individual shapes, such as turkeys, leaves, or letters.
- Cut them out, leaving a small border of color around each edge.
- Punch a hole near the top of each piece with a hole punch.
- Thread baker’s twine or ribbon through each hole, spacing pieces 3 to 4 inches apart.
- Tie the ends to the mantel, a curtain rod, or a clear hook.
Step 4: Protect and Display Your Printables
Paper decor has a short life if you leave it in direct sunlight, near a heat vent, or in a damp room. Laminating sheets or sealing them with a clear matte spray can extend their life through the season. Read the spray label for ventilation instructions and let coated pieces dry fully before stacking them.
For a clean finish, mount wall art on foam board or a rigid backing so it stays flat. Use removable adhesive putty or painter’s tape on painted walls to avoid damage. On windows, a small amount of water-based adhesive or static cling sheets works better than tape, which can leave residue.
Tips for Better Results
- Print a sample first on the paper you plan to use. Ink looks different on each stock.
- Use a paper trimmer rather than scissors for straight edges on place cards and tags.
- Keep a labeled folder of your files so you can reprint the same design next year.
- Layer printables on a slightly larger sheet of contrasting cardstock for a framed look.
- Add small touches such as twine, dried leaves, or a sprig of rosemary to tie the decor together.
Common Mistakes
- Printing at the wrong scale. Turning on “fit to page” can shrink or stretch designs unexpectedly.
- Using thin paper for large pieces. Wall art and garlands sag or curl without enough weight.
- Ignoring ink coverage. Large dark areas can cause streaking or take a long time to dry, so test them first.
- Skipping the margin check. Designs cut off at the edges look unfinished.
- Overcrowding the space. Too many printables compete with each other. Pick a focal point and keep the rest simple.
Recommended Gear
A few basic supplies make printable decor look more finished and easier to make:
- Heavy cardstock: holds shape for place cards and garlands better than copy paper. View on Amazon
- Paper trimmer: gives clean, straight cuts on tags and cards, which is harder to achieve with scissors. View on Amazon
- Hole punch and baker’s twine: makes garland assembly quick and keeps the pieces evenly spaced. View on Amazon
- Clear matte sealing spray: protects printed surfaces from smudging and light moisture. View on Amazon
FAQ
What paper is best for Thanksgiving decorations to print?
Cardstock between 65 and 110 pound is the most reliable choice for most projects. It holds its shape on tables and walls and prints well with home inkjet and laser printers. Use thinner paper only for small items like gift tags.
Can I print these at a copy shop instead of at home?
Yes. Copy shops can print on heavier stock, larger sizes, and photo paper, which is useful for wall art. Bring a PDF with the correct dimensions and ask them to print at 100 percent scale.
How far in advance should I print my decorations?
Print about one to two weeks before Thanksgiving. This gives you time to fix mistakes and reprint, but keeps the paper fresh and less likely to fade or curl in storage.
How do I keep printed decor from fading?
Keep it out of direct sunlight and away from heating vents. A clear matte sealer or lamination also helps. Pigment-based inks generally hold color longer than dye-based inks, so check your printer’s ink type if fading is a concern.
Are printable decorations safe to use around food?
Keep printed pieces that have been sealed or laminated away from food surfaces, and do not let guests eat paper decor. If decor will be placed near a serving area, use food-safe practices and consider keeping it on a separate stand.
What is the easiest printable to start with?
Place cards are the simplest. They are small, need only one page, and make an immediate difference at the table. Once you have the sizing and printing process down, move on to garlands and wall art.
Can I use printables outdoors?
Outdoor use is limited. Rain, wind, and sun will damage most paper within a few days. If you want outdoor printables, use laminated or vinyl-based sheets and secure them firmly.
Do I need special software to design printables?
No. Most people use free or built-in tools such as a word processor, a basic image editor, or a free online design program. Set the page size to match your paper before you start adding images.
Conclusion
Printable Thanksgiving decorations are an easy way to add seasonal color without spending much time or effort. Choose designs that suit your space, use heavier paper, print at the correct size, and protect your pieces from light and moisture. Test one page before printing the full set, and your finished display will look polished from the table to the front door.
Related reading
- Turkey Decorations for Thanksgiving: 8 Ideas and How to Style Them
- Thanksgiving Gender Reveal Decorations Review: Who Is It For?
- Thanksgiving Decorations Out of Paper: 8 Easy Projects to Try
- Thanksgiving Decorations Made Out of Paper: 8 Easy DIY Projects
Ready to choose one?
About Ethan Brooks
Ethan Brooks is part of our editorial team and reviews and edits our non-christmas seasonal decor guides, checking product details against manufacturer specifications and owner feedback.