 By Ethan Brooks
Updated November 2026
Thanksgiving decorations out of paper are one of the easiest ways to dress up a dining room, mantel or front door without spending much time or money. In this guide you will learn how to plan a paper decor set, choose the right materials, and build several classic projects, including leaf garlands, paper pumpkins, turkey place cards and a tabletop runner. By the end, you will have a clear process you can repeat for any fall gathering.
Why Paper Works So Well for Thanksgiving Decor
Paper is light, flexible and forgiving. You can cut it, fold it, layer it and reshape it without special training, and it comes in more colors and textures than almost any other craft material. Because it is lightweight, paper pieces hang easily from ribbon or string and won’t weigh down a mantel or a fragile tablecloth. Paper also photographs well, which is useful if you like to capture the table before guests arrive.
Shopping for one? See our guide: 6 Best Thanksgiving Dining Table Decorations for Fall Dinners (2026).
The main limitation is durability. Paper can crease, fade in direct sun and sag when humidity rises. Plan around that by keeping paper pieces indoors, away from heaters and windows that get strong afternoon light, and by sealing projects with a light spray if you expect them to last more than a few weeks. For background on other seasonal materials, see Thanksgiving Decorations Made Out of Paper: 8 Easy DIY Projects, which covers a wider set of paper ideas.
Step 1: Plan Your Color Palette and Layout
Before you cut anything, decide where the decorations will go and what colors will carry through the room. Most successful fall setups use three to four colors: one dominant neutral (cream, kraft brown or sage), one or two accent colors (rust, mustard or deep red), and one metallic or highlight tone (gold or copper). Too many hues can make paper décor look cluttered, especially when it’s grouped on a single wall.
Sketch the layout on paper first. Mark the mantel, the dining table, the entry and any windows you plan to use. Note the wall space and ceiling height so you know whether you need short tabletop pieces or longer garlands that drape. This small planning step prevents the common problem of making ten projects and finding there is nowhere to put them.
Choosing the Right Paper
- Cardstock (65 to 110 lb): Holds its shape for pumpkins, place cards and standing figures.
- Kraft paper: Gives a rustic, warm look and works well for gift tags and wrapped napkins.
- Scrapbook paper: Offers patterns such as plaid, burlap texture and leaf prints.
- Tissue paper: Best for soft, layered pom-poms and hanging accents that move with air.
- Vellum or translucent paper: Useful for window hangings where light can pass through.
Step 2: Gather Tools and Supplies
Most paper projects need only a few basics. Having everything ready before you start keeps the process quick and reduces wasted sheets.
- Cardstock and patterned paper in your chosen palette
- A craft knife or sharp scissors, plus a self-healing cutting mat
- A metal ruler and bone folder for clean, crisp creases
- Glue stick, double-sided tape and a low-temperature glue gun
- Jute twine, ribbon or thin wire for hanging and stems
- Pencil and a few paper templates (leaves, turkey shapes, circles)
Step 3: Build Classic Paper Projects
Paper Leaf Garland
A leaf garland is the most popular starting project because it is fast and forgiving. Trace a leaf shape onto cardstock, cut out 20 to 30 leaves, and vary the sizes between about 3 and 6 inches. Fold each leaf lengthwise along the center vein with a bone folder to add dimension. Punch a small hole at the stem end and thread the leaves onto jute twine, spacing them about 2 inches apart and alternating colors. Hang the finished garland over the mantel or along a window frame.
Paper Pumpkins from Accordion Folds
Cut a strip of cardstock roughly 12 inches long and 1 inch wide. Fold it accordion-style at 1/2 inch intervals, then join the ends in a circle and secure with glue. Gently pull the folds outward to form a rounded shape. Make three to five pumpkins in different sizes, then attach a small brown paper stem with glue. These work well as table accents and can be displayed on a shelf or sideboard.
Turkey Place Cards
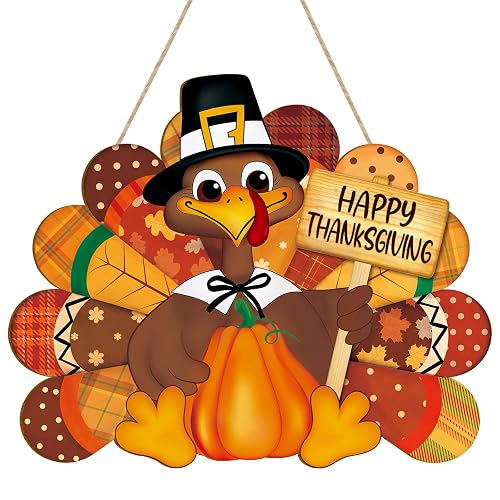
Fold a 4 by 6 inch piece of cardstock in half to create a standing base. Cut a turkey body from a second sheet, cutting fan-shaped tail feathers in layered colors such as orange, red and yellow. Glue the feathers to the back of the body, write each guest’s name on the front, and attach the body to the folded base. Keep the design simple so the names remain easy to read.
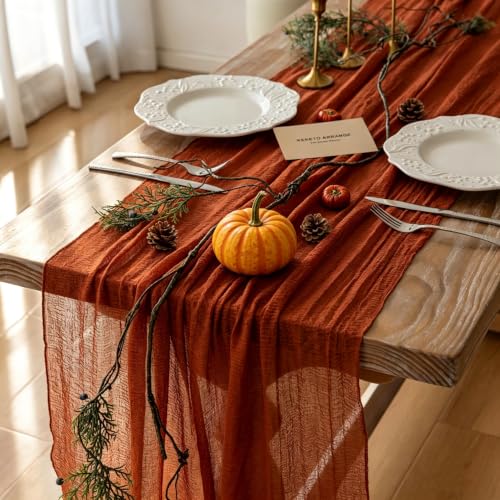
Paper Table Runner
Kraft paper or patterned scrapbook paper can be cut into a runner about 14 inches wide and as long as your table. Add fall motifs with a stamp or a printed border, then fold the edges under and tape them on the underside. Avoid placing the runner under hot dishes, since paper can scorch and warp.
Step 4: Arrange and Display Your Pieces
Group decorations in odd numbers, such as three pumpkins or five leaves, because odd groupings look more natural. Vary the heights: place tall items at the back of a mantel and smaller ones in front. On the dining table, keep the centerpiece low enough that guests can see across it. For more guidance on balancing a table, see Thanksgiving Centerpiece Ideas That Leave Room for Food and Conversation.
When hanging garlands, leave some slack so they can sway slightly. Tape or tie them to a fixed point at both ends instead of stretching them tight, which can tear the paper at the hole punches.
Common Mistakes to Avoid
- Skipping the crease: Scored or folded edges look sharper and hold their shape far better than flat cuts.
- Using glue sticks on heavy pieces: They can fail under weight. Use hot glue or double-sided tape for anything that must stay upright.
- Placing paper near heat or sunlight: Fading and warping happen quickly on windowsills and near radiators.
- Overcrowding the table: Paper décor can look busy fast. Leave space for dishes and drinks.
- Cutting too many pieces at once: Start with one sample of each project to check size and color before committing.
Tips for Making Paper Decor Last
- Store finished pieces flat between sheets of tissue to prevent creasing.
- Use a light clear acrylic spray in a well-ventilated area to reduce fading and moisture damage.
- Reuse templates year after year to save time.
- Keep a small repair kit with extra cardstock, glue dots and matching ribbon.
Recommended Gear
A self-healing cutting mat protects your table and keeps blades sharp, which matters when you cut dozens of identical leaves. Look for a mat sized at least 12 by 18 inches.
A bone folder creates crisp, consistent creases on cardstock without tearing the surface. It is inexpensive and one of the most useful tools for paper projects. View on Amazon
A metal ruler with a cork back keeps your straight edges accurate while you cut with a craft knife. View on Amazon
Low-temperature glue dots and a mini glue gun help you attach heavier pieces, such as pumpkin stems and place card bases, without warping the paper. View on Amazon
FAQ
How far in advance can I make paper Thanksgiving decorations?
Most paper projects can be made two to three weeks ahead. Store them flat and away from humidity so they stay crisp until the holiday.
What is the best paper weight for paper pumpkins?
Cardstock between about 65 and 110 pound weight holds its shape well. Thinner paper tends to collapse under its own folds.
Can paper decorations be used outdoors?
Not for long periods. Rain, wind and sun will damage paper quickly. Use paper outdoors only for short events and bring pieces inside afterward.
How do I keep paper leaves from curling?
Score the center vein gently, then store the leaves under a flat, heavy book for several hours before hanging them.
Are paper decorations safe around children and pets?
Paper is generally low risk, but small pieces such as glued embellishments can be a choking hazard for young children. Keep them out of reach and check items regularly for loose parts. If a pet chews paper and ingests a large amount, contact a veterinarian.
What glue works best for paper crafts?
A glue stick works for flat surfaces, double-sided tape keeps layers aligned, and low-temperature hot glue holds dimensional pieces firmly.
Can I reuse paper decorations next year?
Yes. Store them flat in a dry container and inspect them before reuse. Replace any pieces that are torn, faded or water-stained.
How do paper decorations compare with fabric or wood?
Paper is lighter and cheaper to replace but less durable. Fabric and wood last longer and handle handling better, while paper offers more pattern variety and is easier to customize at home.
Conclusion
Thanksgiving decorations out of paper give you full control over color, size and style with only basic tools. Plan your palette, choose the right weight of paper, and start with one or two simple projects such as a leaf garland or pumpkins. With a little care for storage and placement, your paper décor can carry the fall mood from the entry to the dinner table.
Related reading
- Turkey Decorations for Thanksgiving: 8 Ideas and How to Style Them
- Fiber Optic Thanksgiving Decorations: 7 Ideas and Setup Tips
Ready to choose one?
About Ethan Brooks
Ethan Brooks is part of our editorial team and reviews and edits our non-christmas seasonal decor guides, checking product details against manufacturer specifications and owner feedback.