 By Ethan Brooks
Updated November 2026
Thanksgiving door decorations for a classroom can turn a plain hallway door into a welcoming display that students notice on the way in. This guide walks you through choosing a theme, planning the layout, building or assembling the decor, and attaching it so it survives a few weeks of daily opening and closing. You will also find a checklist, a comparison table and a list of common mistakes to avoid.
Why a Classroom Door Matters for Thanksgiving
A classroom door is the first thing families see at pickup and the first thing students see when they arrive. A well-planned Thanksgiving display signals the season without taking over the room, and it gives you a simple way to share a seasonal theme with the whole school. Keep the design readable from about 10 feet away, because that is roughly the distance from which most people will first look at it.
Shopping for one? See our guide: 6 Best Thanksgiving Dining Table Decorations for Fall Dinners (2026).
Step 1: Choose a Theme That Fits Your Grade Level
Start with one clear theme so the door does not look cluttered. Common options for a Thanksgiving classroom door include:
- Gratitude tree: bare branches with paper leaves where each student writes one thing they are thankful for.
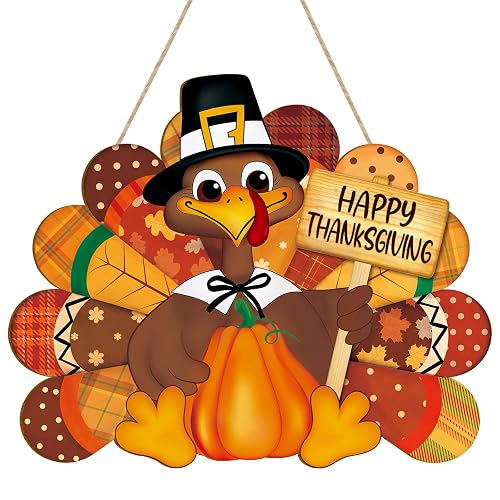
- Turkey feather wall: a large turkey made from student handprint feathers, a popular choice for younger grades.
- Harvest scene: a row of pumpkins, corn stalks and wheat tied to the door frame.
- Pilgrim and Native American history (grades 3 and up): a timeline or map display that connects to social studies units, handled with care and accurate, age-appropriate content.
If you already have a fall theme running through the room, you can match it. For ideas on fall-specific designs for younger students, see Fall Door Decor for Preschool: A Step-by-Step Guide for Classroom Doors.
Step 2: Measure the Door and Plan the Layout
Most classroom doors are about 36 inches wide and 80 inches tall, though sizes vary. Measure your own door before you buy or cut anything. Then sketch a simple layout on paper:
- Mark the center line of the door.
- Place the main focal piece (a turkey, tree or large sign) in the upper two-thirds, roughly at eye level for students.
- Keep the lower third open or use it for small items like a name tag rail, so the door does not look bottom-heavy.
- Leave at least 3 to 4 inches of clear border around the edges so the decor does not block the door handle or the window.
Check that the door can close fully with the decor in place. A thick bundle of leaves can catch on the frame.
Step 3: Build or Assemble the Decor
Paper and cardstock projects
Paper is the most common material for classroom doors because it is light, cheap to replace and easy for students to help with. Cut large shapes from poster board, layer them for depth and use a hot glue gun or double-sided foam tape for attachment. If you want more project ideas, Thanksgiving Decorations Made Out of Paper: 8 Easy DIY Projects covers a range of options that work well on a door.
Student handprint and writing elements
Handprints and written gratitude notes add a personal touch. Plan a fixed size for each piece, such as a 4-inch handprint on 8.5-by-11-inch cardstock, so the finished display stays balanced. Write each student’s name clearly on the back before you collect the pieces.
Foliage and fall accents
Artificial leaves, mini pumpkins and small gourds add texture. Keep anything small enough that it cannot be pulled off and swallowed by a young child. Foam or felt pumpkins are a safer choice for kindergarten and first grade.
Step 4: Attach the Decor Safely
Attachment method matters more than many teachers expect, because doors open and close dozens of times a day. Use the following approach:
- Use painter’s tape or removable adhesive strips on painted doors. Test a small spot first, since some finishes peel.
- Use clear packing tape along the seams of large paper pieces to reduce curling.
- Hang lightweight items on a small ribbon loop over a hook if your school permits it.
- Do not block fire exit signage, door-mounted alarms or any required safety notices. Check your school’s policy first.
Many schools restrict adhesives or hardware on doors, so confirm with your administrator before you start. Fire marshal rules on decorations are often specific, and a quick check now saves a removal request later.
Quick Setup Checklist
- Confirm school policy on door decorations and adhesives
- Measure the door width, height and handle clearance
- Sketch a layout with a focal point and border
- Cut or assemble all paper and foam pieces before installation
- Label student work on the back
- Test attachment on a small section of the door
- Check that the door opens and closes fully
- Photograph the finished display for your records
Comparing Common Door Display Styles
| Style | Best grade level | Setup time (approx.) | Main advantage |
|---|---|---|---|
| Gratitude tree | K to 5 | 1 to 2 hours | Shows student voices clearly |
| Handprint turkey | K to 2 | 1 to 2 hours | Quick to build with a class |
| Harvest scene | All grades | 1 hour | Works with any room theme |
| History timeline | 3 to 5 | 2 to 3 hours | Connects to a unit of study |
Tips for a Door That Lasts
- Build in layers. A base sheet, a middle layer and small top accents give depth without weight.
- Plan a removal date. Taking the display down the week after the break keeps the door from looking worn.
- Store pieces flat in a labeled folder or envelope so you can reuse them next year.
- Involve students in the build. Assigning jobs like cutting, sorting and writing gives the project a sense of ownership.
Common Mistakes to Avoid
- Going too big. A display that spreads past the frame can catch on the door or block the window.
- Using tape on fresh paint. Wait until the finish has cured, or use a low-tack option.
- Forgetting the handle. Keep the handle and lock area clear so the door still works smoothly.
- Skipping the test run. Open and close the door a dozen times before you walk away.
- Leaving small parts within reach. Choose attachments and accents that are safe for the youngest students in the building.
Recommended gear
- Removable mounting strips let you hang lightweight pieces without marking the paint. Look for a damage-free adhesive that is rated for smooth painted surfaces. View on Amazon
- A mini hot glue gun works well for quick assembly of foam pumpkins and leaves. Choose one with a low-temperature setting for younger helpers. View on Amazon
- Clear packing tape reinforces the seams of large cardstock pieces and helps them lie flat on the door. View on Amazon
- A laminated paper cutter or craft trimmer speeds up cutting of many identical shapes, such as leaves or handprint templates. View on Amazon
FAQ
How long should a Thanksgiving classroom door stay up?
Most teachers put the display up in the week before Thanksgiving and take it down within a few days after the break. Leaving it longer can make the door look faded or outdated.
What is the best material for a door that gets opened all day?
Lightweight cardstock layered on poster board works well. Heavier materials like wood or large foam pieces can strain the attachment and make the door harder to close.
Can I use real leaves or pumpkins?
Real leaves dry out and drop debris, and fresh produce can attract insects. Artificial or dried materials are safer and last longer on a door.
How do I hang decor without damaging painted doors?
Use painter’s tape or a removable adhesive designed for painted surfaces. Test in a hidden spot first, and remove the strips slowly at an angle.
Should students help make the door?
Yes, when it fits your schedule. Students can cut, sort, color and write, which spreads the work and gives the display more meaning. Assign tasks by age and skill level.
What if my school does not allow decorations on doors?
Many schools allow a bulletin board or a display just inside the room instead. Ask your administrator for the approved option, and consider a window cling or a hallway board as alternatives.
How do I keep the display safe for young children?
Avoid small detachable parts, sharp edges and anything that could be pulled down onto a child. Keep any hanging pieces short and well secured.
Can I reuse the decorations next year?
Yes. Store flat pieces in a labeled folder or bin, keep foam and paper dry, and mark which pieces need repair before the next season. For more seasonal storage tips, see When to Put Away Easter Decorations: Timing, Steps and Storage Tips.
Conclusion
A good Thanksgiving door for a classroom starts with a clear theme, accurate measurements and a layout that leaves room for the handle and frame. Build in layers, attach with materials your school allows, and involve students where you can. Plan the takedown date before you start, and store the pieces so the next round of decorating takes less time.
Related reading
Ready to choose one?
About Ethan Brooks
Ethan Brooks is part of our editorial team and reviews and edits our non-christmas seasonal decor guides, checking product details against manufacturer specifications and owner feedback.