 By Ethan Brooks
Updated November 2026
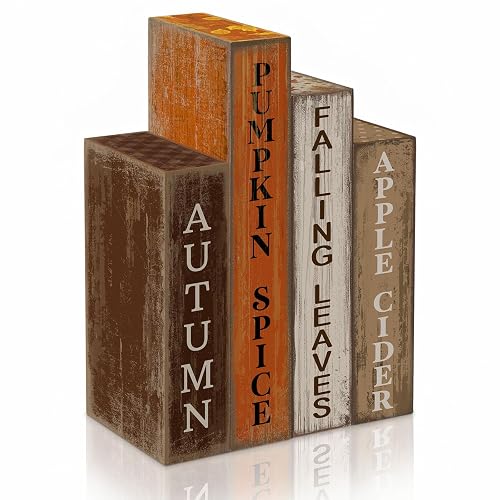
DIY Thanksgiving wood decorations are one of the easiest ways to add warm, natural character to your fall home. With a few basic tools, a piece of scrap wood or a craft-store wood round, and some paint or stain, you can make signs, centerpieces, and seasonal accents that look handmade in the best sense. This guide walks through how to plan, cut, finish, and display your pieces.
Choose the Right Wood and Shapes
Start with wood that is smooth, dry, and free of warping. Pine and poplar are easy to cut, sand, and paint, while basswood is good for fine lettering or carving. Wood rounds in 1/2-inch to 3/4-inch thickness work well for coasters and small tags, and 1-by-6 boards suit larger signs. Sketch your design on paper first so you know the final size before you cut.
Shopping for one? See our guide: 6 Best Thanksgiving Dining Table Decorations for Fall Dinners (2026).
Make Wood Signs, Tags, and Place Cards
Wood signs are the most popular beginner project. Cut your board to length, sand it with 120-grit and then 220-grit paper, and wipe away the dust with a damp cloth. Transfer lettering using carbon paper or a printed stencil, then paint over the outlines with acrylic paint in cream, rust, or deep green. Once dry, seal the surface with a matte spray varnish. For place cards, drill a small hole near the top and thread twine through it.
Basic tools checklist
- Hand saw or miter saw for clean, square cuts
- Sandpaper in 120-grit and 220-grit
- Acrylic paints and a set of small brushes
- Pencil, ruler, and transfer paper or stencils
- Matte spray sealer
- Drill with a 1/8-inch bit for hanging holes
Build Wood Pumpkins and Leaf Accents
Wood pumpkins can be made from thin wood discs stacked and glued, or from a single round trimmed into a rough oval. Stack three to five discs of decreasing size, glue them with wood glue, and clamp for at least an hour. Carve shallow grooves around the sides with a rotary tool to suggest pumpkin ribs. Paint the pieces orange or cream, then add a short stem cut from a twig.
For leaves, trace leaf shapes onto thin plywood or balsa, cut them out with a scroll saw or coping saw, and sand the edges smooth. Paint them in gold, burnt orange, and brown, then layer a darker wash over the tips for a weathered look. These work well strung along a mantel or glued to a wreath base.
Style a Wood Centerpiece
A wood centerpiece ties your whole table together. Lay a 12-inch to 16-inch wood slice or a sanded plank as the base, then arrange your pumpkins, a small sign, and a few pinecones around it. Keep the tallest item near the center and no more than about 12 inches high so guests can see across the table. Add a short taper candle in a holder if you want warm light, and keep flames well away from paper or dried plant material.
FAQ
What is the easiest DIY wood decoration for a beginner?
A painted wood sign with stenciled lettering is the simplest starting project. It needs only a board, paint, a brush, and a sealer, and mistakes are easy to fix with a second coat.
Which paint works best on wood for Thanksgiving decor?
Acrylic craft paint is the most common choice because it dries quickly, comes in many colors, and cleans up with water. Seal the finished piece with a matte varnish to protect it from handling and dust.
Can I make these decorations with kids?
Yes, kids can sand, paint, and glue wood pieces with close supervision. Let them handle painting and decorating while adults do all sawing, drilling, and any tool work.
Conclusion
DIY Thanksgiving wood decorations are practical, affordable to make, and easy to customize for your home. Start with one simple sign or a stack of wood pumpkins, then build up to a full centerpiece as your confidence grows. Store your pieces in a dry place between seasons so they last for years.
Related reading
- Thanksgiving Decorations Made Out of Paper: 8 Easy DIY Projects
- Handmade Thanksgiving Decorations DIY: 8 Easy Projects with Steps
- Easy Thanksgiving Decorations DIY: 8 Projects with Steps for Fall
- DIY Thanksgiving Turkey Decorations: 8 Easy Projects with Steps
Ready to choose one?
About Ethan Brooks
Ethan Brooks is part of our editorial team and reviews and edits our non-christmas seasonal decor guides, checking product details against manufacturer specifications and owner feedback.